
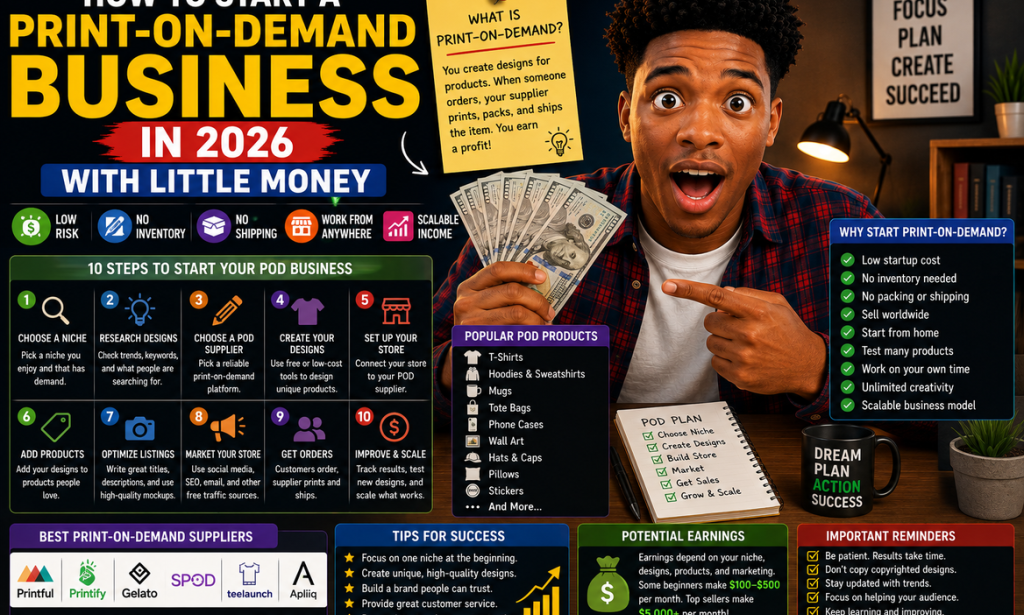
How to Start a Print-on-Demand Business in 2026 With Little Money
A Complete Beginner's Guide
Print-on-demand is a business model that allows you to sell customized products without buying large amounts of inventory in advance.
You create or choose designs, place them on products such as shirts, mugs, tote bags, phone cases, or wall art, and list those products for sale.
When a customer places an order, the print-on-demand company produces and ships the item.
This means you can start with relatively little money compared with a traditional product business.
However, print-on-demand is not automatic income. Success depends on choosing the right niche, creating appealing designs, presenting your products well, attracting customers, and continually improving your store.
Here's how to get started.
Step 1: Understand How Print-on-Demand Works
The basic process is:
Choose a niche → create a design → add it to a product → list the product → customer orders → supplier prints and ships it → you keep the difference after costs.
You don't normally need to store products in your home.
Step 2: Choose a Niche
A niche gives your store a specific audience.
Examples include:
-
Fitness enthusiasts
-
Pet owners
-
Teachers
-
Travelers
-
Gamers
-
Book lovers
-
Parents
-
Car enthusiasts
-
Sports fans
-
Hobby communities
Choose a group you understand.
Step 3: Research Your Niche
Before creating dozens of products, research what people actually like.
Look at:
-
Popular product styles
-
Common phrases
-
Customer interests
-
Existing competitors
-
Product reviews
-
Seasonal opportunities
Your goal is to discover what customers may actually want to buy.
Step 4: Choose Your Products
You can sell many types of print-on-demand products.
Popular options include:
-
T-shirts
-
Hoodies
-
Sweatshirts
-
Mugs
-
Tote bags
-
Posters
-
Wall art
-
Phone cases
-
Hats
-
Stickers
-
Pillows
Start with a small selection rather than trying everything at once.
Step 5: Choose a Print-on-Demand Supplier
Compare suppliers carefully.
Consider:
-
Product quality
-
Base prices
-
Shipping costs
-
Delivery times
-
Available products
-
Printing quality
-
Customer support
-
Store integrations
-
Geographic coverage
Don't choose a supplier based only on the lowest price.
Step 6: Order Samples
If possible, order samples before promoting your products heavily.
Check:
-
Print quality
-
Material quality
-
Colors
-
Sizing
-
Packaging
-
Shipping time
You want to know what customers will actually receive.
Step 7: Create Your Designs
Your designs don't need to be complicated.
A strong design can be:
-
Simple
-
Clear
-
Memorable
-
Relevant to the niche
-
Easy to read
Focus on creating something that fits the audience.
Step 8: Avoid Copyright Problems
Don't copy other people's artwork, characters, logos, slogans, or protected designs.
Just because an image appears online doesn't mean you can legally use it on merchandise.
Create original designs or use assets with appropriate commercial rights.
Step 9: Build a Brand
Give your store a recognizable identity.
Think about:
-
Store name
-
Logo
-
Typography
-
Product style
-
Tone
-
Target audience
A consistent brand can make your store look more professional.
Step 10: Create Your Store
Choose a selling platform that fits your budget and goals.
Your store should make it easy for customers to:
-
Browse products
-
See product images
-
Understand sizing
-
Read descriptions
-
Check shipping information
-
Purchase securely
Keep the design simple.
Step 11: Write Better Product Titles
Your product title should clearly explain what the product is.
Instead of:
Cool Shirt
use something more descriptive, such as:
Funny Gardening T-Shirt for Plant Lovers
Be accurate and avoid stuffing titles with unnecessary keywords.
Step 12: Write Useful Product Descriptions
Explain:
-
What the product is
-
Who it's for
-
Materials
-
Available sizes
-
Design details
-
Care instructions
-
Shipping information
Answer the questions a customer is likely to have before buying.
Step 13: Use High-Quality Product Images
Your images are extremely important.
Show products from different angles when possible.
Include:
-
Front view
-
Back view
-
Close-up
-
Lifestyle image
-
Size information
Customers can't physically examine the product online, so your images need to do the job.
Step 14: Create Mockups Carefully
Mockups help customers visualize the product.
Choose images that look natural and relevant to your audience.
Avoid misleading images that make the product look significantly different from what customers will receive.
Step 15: Set Your Prices
Your selling price needs to account for your costs.
Consider:
Product cost + platform fees + payment fees + advertising costs + desired profit = pricing decision
Don't forget shipping when determining your margins.
Step 16: Understand Your Profit Margin
A product selling for $25 doesn't mean you make $25.
You may have:
-
Product costs
-
Printing costs
-
Shipping
-
Platform fees
-
Payment processing
-
Advertising expenses
-
Refunds
Calculate your expected profit before listing products.
Step 17: Start With a Small Collection
You don't need 500 products.
Start with perhaps a focused collection around one niche.
For example:
10 designs × 3 products = 30 listings
You can expand after learning what customers respond to.
Step 18: Test Different Designs
Not every design will sell.
That's normal.
Test different:
-
Styles
-
Messages
-
Layouts
-
Product types
-
Audiences
Keep track of what gets attention and sales.
Step 19: Create Seasonal Products
Seasonal opportunities can include:
-
Holidays
-
Graduation
-
Birthdays
-
Weddings
-
Sports seasons
-
Special events
-
Seasonal hobbies
Plan ahead because customers often shop before the event.
Step 20: Don't Depend Only on Trends
Trends can disappear quickly.
Build a mixture of:
-
Evergreen designs
-
Seasonal designs
-
Timely designs
This gives your store more stability.
Step 21: Promote Your Products
A great product won't sell if nobody sees it.
Potential marketing channels include:
-
Social media
-
Short-form videos
-
Pinterest
-
YouTube
-
Email
-
Online communities
-
Search traffic
-
Paid advertising
Choose channels that fit your audience.
Step 22: Use Social Media
Create content around your niche rather than posting only product advertisements.
You can share:
-
Design previews
-
Product demonstrations
-
Styling ideas
-
Behind-the-scenes content
-
Customer photos
-
Helpful tips
-
New product announcements
Step 23: Build an Audience
An audience can become more valuable than a single product.
If people follow your brand because they enjoy your content, you have more opportunities to introduce new products.
Step 24: Encourage Customer Photos
With customer permission, photos from real customers can provide useful social proof.
They also help future buyers understand how products look in real situations.
Step 25: Provide Good Customer Service
Customers may contact you about:
-
Sizing
-
Shipping
-
Damaged products
-
Returns
-
Order problems
Respond professionally and follow your store's policies.
Step 26: Have Clear Policies
Clearly explain:
-
Shipping
-
Returns
-
Exchanges
-
Cancellations
-
Damaged products
-
Order changes
Clear policies reduce confusion.
Step 27: Track Your Orders
Keep track of:
-
Orders
-
Revenue
-
Product costs
-
Shipping
-
Fees
-
Refunds
-
Profit
Knowing your numbers helps you make better decisions.
Step 28: Identify Your Best Products
After collecting enough data, look for products that consistently perform well.
You can then create related designs or variations.
Step 29: Remove Weak Products
Don't be afraid to remove products that receive little interest.
Your store should become more focused over time.
Step 30: Improve Your Listings
If a product receives views but few purchases, examine:
-
Product images
-
Price
-
Description
-
Design
-
Customer reviews
-
Shipping information
Small improvements can make a difference.
Step 31: Think About Shipping
Shipping can affect whether customers complete a purchase.
Consider:
-
Shipping cost
-
Delivery estimates
-
Production time
-
Customer location
Be transparent about expected delivery times.
Step 32: Choose Products With Reasonable Margins
A product may look popular but still be difficult to sell profitably if the costs are too high.
Compare suppliers and calculate your numbers before committing to a product.
Step 33: Don't Spend Too Much at the Beginning
One advantage of print-on-demand is that you don't necessarily need a warehouse full of inventory.
Start carefully.
Spend money where it directly improves your business.
Step 34: Be Careful With Paid Advertising
Advertising can increase traffic, but it can also increase expenses quickly.
Start with a controlled budget and measure results.
Don't continue spending simply because an advertisement receives clicks.
Step 35: Learn From Your Data
Pay attention to:
-
Views
-
Clicks
-
Add-to-cart activity
-
Sales
-
Conversion rate
-
Revenue
-
Profit
Your numbers can tell you which parts of your business need improvement.
Step 36: Create Multiple Designs Around Winning Ideas
If one design performs well, you can explore related versions.
For example:
Design A: Dog lover
Design B: Cat lover
Design C: Rescue pet owner
Keep each design original and relevant.
Step 37: Build Customer Loyalty
Encourage customers to return by offering:
-
New designs
-
Seasonal collections
-
Useful content
-
Email updates
-
Loyalty incentives where appropriate
A returning customer may be more valuable than constantly finding new customers.
Step 38: Keep Learning
Improve your skills in:
-
Design
-
Marketing
-
Product research
-
Copywriting
-
Customer service
-
Photography
-
E-commerce
-
Financial management
Your business improves as your skills improve.
Step 39: Don't Expect Instant Success
Some products may sell quickly.
Others may never sell.
You may need to test many designs before finding products that connect with your audience.
Treat early results as information.
Step 40: Create a 30-Day Plan
Week 1
Choose your niche.
Research your audience.
Study competitors.
Choose potential products.
Week 2
Create your first designs.
Compare suppliers.
Order samples if possible.
Week 3
Build your store.
Create product listings.
Prepare product images.
Set prices.
Week 4
Launch your products.
Start promoting them.
Track results.
Improve your weakest listings.
Step 41: Think Beyond T-Shirts
T-shirts are popular, but they aren't the only option.
You can experiment with:
-
Mugs
-
Tote bags
-
Posters
-
Stickers
-
Phone cases
-
Hoodies
-
Hats
-
Home décor
Choose products that make sense for your niche.
Step 42: Build a Business, Not Just a Store
A successful print-on-demand business involves more than uploading designs.
You need to build:
A niche → a brand → products → an audience → customer relationships → repeat sales.
That's what turns a collection of products into a business.
Final Thoughts
Starting a print-on-demand business in 2026 can be a practical way to experiment with e-commerce without purchasing large amounts of inventory upfront.
You can begin with a small collection, test different designs, learn what your audience likes, and gradually expand.
The most important things are choosing a good niche, creating original designs, selecting reliable suppliers, pricing products carefully, providing accurate information, and consistently marketing your store.
Don't expect every design to succeed.
Test.
Learn.
Improve.
Then build on what works.
With patience and careful management, a small print-on-demand store can develop into a larger online business.

You must be logged in to post a comment.