
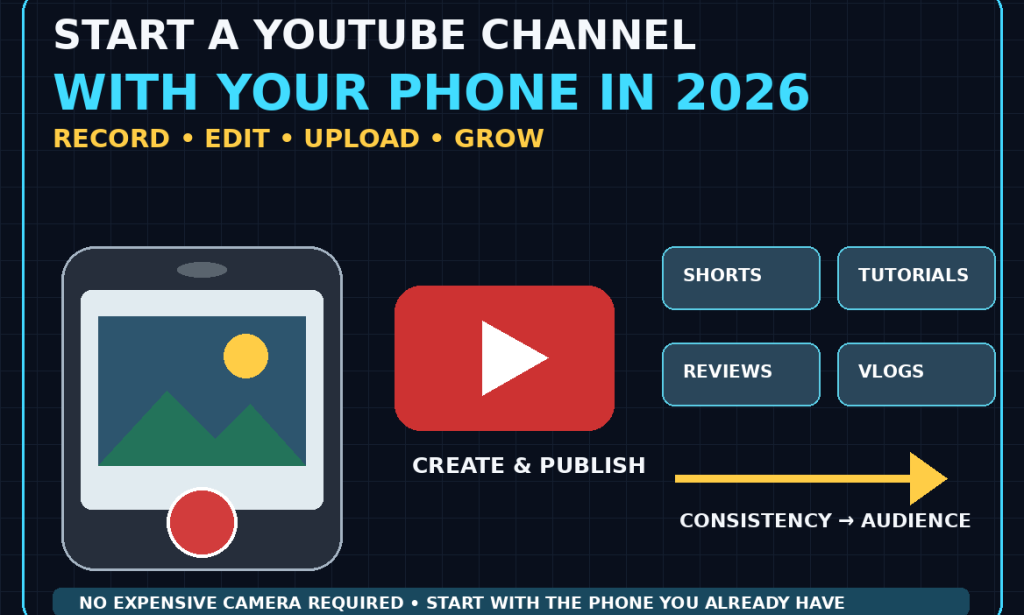
How to Start a YouTube Channel With Your Phone in 2026
A Complete Beginner's Guide to Creating Videos Without Expensive Equipment
Starting a YouTube channel no longer requires a professional camera, expensive lighting, or a complicated studio.
For many beginners, the most useful piece of equipment is already in their pocket:
a smartphone.
Modern phones can record high-quality video, capture clear audio, edit footage, create thumbnails, manage uploads, and communicate with an audience.
That means you can start learning how YouTube works without spending a huge amount of money on equipment.
The biggest challenge isn't having the perfect camera.
It's choosing a useful topic, creating videos people want to watch, and consistently improving your content.
This guide explains how to start a YouTube channel using your phone in 2026.
Why Start a YouTube Channel With Your Phone?
A smartphone gives beginners a major advantage.
You can use it to:
-
Record videos
-
Take photographs
-
Record voiceovers
-
Edit videos
-
Create thumbnails
-
Upload videos
-
Respond to comments
-
Check analytics
-
Manage your channel
-
Communicate with viewers
You don't have to wait until you can afford professional equipment.
Start with what you have.
You can upgrade later when you know what type of content you enjoy creating.
Step 1: Decide Why You Want a YouTube Channel
Before creating your channel, ask yourself why you're doing it.
Your goal might be:
-
Teaching people
-
Sharing knowledge
-
Building a personal brand
-
Documenting a hobby
-
Creating entertainment
-
Promoting a business
-
Building an audience
-
Sharing your experiences
-
Supporting a career
-
Creating another potential income source
Your goal will influence your content strategy.
For example, someone who wants to teach might create tutorials.
Someone interested in entertainment might create commentary, challenges, or storytelling videos.
A business owner might create educational content related to their products or industry.
Step 2: Choose One Main Topic
One of the easiest mistakes to make is creating a channel about absolutely everything.
One day you upload a cooking video.
The next day you upload a gaming video.
Then you post a technology review.
Then a travel vlog.
There is nothing inherently wrong with variety, but beginners often benefit from having a recognizable theme.
Choose a broad area you're genuinely interested in.
Examples include:
-
Technology
-
Education
-
Fitness
-
Cooking
-
Personal finance
-
Travel
-
Gaming
-
Books
-
DIY
-
Career advice
-
Productivity
-
Entertainment
-
News commentary
-
Tutorials
-
Hobbies
You can become more specific later.
Step 3: Choose a Subtopic
A broad category can be difficult to build around.
Instead of:
Technology
consider:
Smartphone tips for beginners
Instead of:
Cooking
consider:
Simple meals for busy people
Instead of:
Fitness
consider:
Beginner home workouts
Instead of:
Education
consider:
Study techniques for students
A specific angle makes it easier to decide what videos to create.
Step 4: Research What People Already Watch
Before recording your first video, search YouTube for your topic.
Look at:
-
Popular videos
-
Recent videos
-
Video titles
-
Thumbnails
-
Comments
-
Questions viewers ask
-
Topics that appear repeatedly
Don't copy another creator.
Instead, identify what viewers are interested in.
For example, if you want to create smartphone tutorials, you might notice people repeatedly searching for:
-
Battery tips
-
Camera settings
-
Storage solutions
-
Privacy settings
-
Hidden features
-
App recommendations
Those observations can become your own video ideas.
Step 5: Create Your YouTube Channel
You'll need a Google Account and a YouTube channel before you can upload videos.
YouTube's current instructions explain that you can create a channel through YouTube using a computer or the mobile site, choose a profile picture, name, and handle, and create the channel. (Google Support)
Choose a channel name that is:
-
Easy to remember
-
Easy to spell
-
Relevant to your content
-
Not unnecessarily long
Don't spend weeks trying to find the perfect name.
Your content matters more.
Step 6: Choose a Good Channel Name
You have several options.
You could use:
Your real name
This works well for personal brands.
Or:
A descriptive brand name
This can work well for educational or themed channels.
Or:
A creative name
This can work for entertainment and personality-driven channels.
The most important thing is consistency.
Step 7: Create a Simple Profile Picture
You don't need an expensive logo.
Depending on the channel, you could use:
-
A clear personal photo
-
A simple logo
-
A recognizable graphic
-
A clean brand symbol
Make sure it remains recognizable even when displayed at a small size.
Step 8: Write a Clear Channel Description
Your channel description should explain what viewers can expect.
For example:
Welcome to the channel. I share simple smartphone tutorials, useful apps, productivity tips, and technology guides designed for everyday users.
A visitor should understand your channel within a few seconds.
Step 9: Prepare Your Smartphone
You don't need a flagship phone.
Before recording, however, do a few simple things.
Clean the camera lens
A dirty lens can make footage look blurry.
Free up storage
Video files can take a lot of space.
Charge the battery
You don't want your phone dying halfway through recording.
Turn off unnecessary notifications
Notifications appearing during recording can be distracting.
Use the rear camera when appropriate
It often provides better image quality on many phones.
Step 10: Find Good Lighting
Good lighting can make a bigger difference than buying an expensive camera.
The easiest free light source is often:
a window.
Face the window rather than placing the window directly behind you.
This can provide soft, natural light.
Avoid extremely harsh direct sunlight if possible.
Step 11: Record Somewhere Quiet
Audio quality matters.
Viewers may tolerate average video quality.
They are less likely to tolerate audio that is difficult to understand.
Before recording:
-
Close windows if there's excessive noise
-
Turn off loud fans
-
Move away from traffic noise
-
Choose a quiet room
-
Avoid rooms with excessive echo
You don't need a professional studio.
You need understandable audio.
Step 12: Improve Your Phone Audio
Your phone's built-in microphone may be enough to begin.
Later, you can consider an affordable external microphone if your content requires better audio.
But don't let equipment stop you from starting.
A quiet environment can make a noticeable difference even before you buy anything.
Step 13: Keep Your Phone Stable
Shaky footage can make videos uncomfortable to watch.
You can use:
-
A tripod
-
A phone stand
-
A stable table
-
A safe improvised support
If you're recording yourself, position the phone at approximately eye level when appropriate.
Avoid holding the phone at an awkward angle for long talking videos.
Step 14: Decide Between Vertical and Horizontal Video
The format depends on the type of content.
Vertical
Useful for:
-
Shorts
-
Quick tips
-
Mobile-focused content
-
Short tutorials
-
Social-style videos
Horizontal
Useful for:
-
Traditional YouTube videos
-
Tutorials
-
Reviews
-
Interviews
-
Educational videos
-
Longer presentations
Think about where viewers will watch the content and what type of video you're making.
Step 15: Start With Short Videos
Your first videos don't need to be 30 minutes long.
Start with something manageable.
For example:
30 seconds
60 seconds
3 minutes
5 minutes
As you become more comfortable, you can create longer videos.
The objective is to learn the process.
Step 16: Write a Simple Script
You don't need to write every word.
A simple structure can be enough.
Introduction
Tell viewers what they're going to learn.
Main Points
Explain the information.
Example
Show how it works.
Conclusion
Summarize the key point.
Call to Action
Invite viewers to subscribe or watch another relevant video.
This structure helps prevent rambling.
Step 17: Start With a Strong Opening
The first few seconds matter.
Don't spend the entire opening saying:
"Hello everyone, welcome back to my channel..."
Instead, quickly explain the value.
For example:
"Here are five smartphone settings you should change today."
Then deliver what you promised.
Step 18: Don't Promise Something You Don't Deliver
Your title and opening should accurately represent the video.
If the title promises:
5 Free Apps That Improve Your Productivity
the video should actually provide five useful apps.
Avoid misleading titles.
A viewer who feels tricked may leave quickly and may not trust your channel again.
Step 19: Record Multiple Takes
Your first recording doesn't have to be perfect.
If you make a mistake:
Pause.
Start the sentence again.
Continue.
You can remove the mistake during editing.
This is much easier than trying to record an entire video perfectly in one take.
Step 20: Edit on Your Phone
There are many mobile video-editing apps available.
Look for tools that allow you to:
-
Trim clips
-
Remove mistakes
-
Add text
-
Add captions
-
Adjust audio
-
Add transitions
-
Add music where appropriate
-
Export video
You don't need every editing feature.
Learn the basics first.
Step 21: Remove the Boring Parts
During editing, remove:
-
Long pauses
-
Repeated sentences
-
Mistakes
-
Unnecessary introductions
-
Dead space
-
Sections that don't add value
You don't have to remove every pause.
Natural pacing is fine.
The goal is to keep the video moving.
Step 22: Add Captions
Captions can make your videos easier to follow.
They can be especially useful when:
-
People watch without sound
-
Your accent is unfamiliar to some viewers
-
You're explaining technical subjects
-
You use specialized terminology
Check automatically generated captions for mistakes before relying on them completely.
Step 23: Use Music Carefully
Background music can add atmosphere.
But don't let music overpower your voice.
Also make sure you have the necessary rights to use music.
Don't assume that because you found a song online, you can automatically use it in your video.
Copyright problems can create unnecessary complications.
Step 24: Create a Thumbnail
Your thumbnail is one of the first things potential viewers see.
A simple thumbnail can include:
-
One clear image
-
A short phrase
-
Strong visual contrast
-
One main idea
Avoid filling the thumbnail with tiny text.
For example:
Instead of:
"10 Amazing Smartphone Settings That You Probably Didn't Know About But Should Definitely Consider Using"
use something like:
10 PHONE SETTINGS
Keep it simple.
Step 25: Write Better Titles
Your title should make the value of the video clear.
Examples:
5 Smartphone Settings You Should Change Today
How to Edit YouTube Videos on Your Phone
7 Free Apps Every Student Should Know
How I Plan My Week Using Only My Phone
Specific titles are often easier to understand than vague ones.
Step 26: Write a Useful Description
The description can explain:
-
What the video covers
-
Important resources
-
Relevant links
-
Additional information
-
Chapters, when appropriate
-
Disclosures where required
The first few lines are especially useful because they can help viewers understand the video before expanding the description.
Step 27: Use Relevant Keywords Naturally
Think about what someone would type into YouTube to find your video.
For example:
how to edit videos on phone
could become part of a relevant title or description if that accurately describes your video.
Don't stuff your description with unrelated keywords.
Make the content useful first.
Step 28: Upload Consistently
You don't necessarily need to upload every day.
Choose a schedule you can maintain.
For example:
One long video per week
or
Two videos per week
or
Several Shorts plus one longer video
Consistency matters more than creating an unrealistic schedule that you abandon after two weeks.
Step 29: Don't Compare Your First Video to a Famous Creator
This is important.
A successful creator may have:
-
Years of experience
-
Professional equipment
-
Editors
-
Designers
-
Researchers
-
A large audience
-
Established distribution
Your first video shouldn't be compared to their thousandth.
Compare:
Your latest video
with:
your previous video.
That's a more useful measurement.
Step 30: Learn From Your Analytics
YouTube provides analytics that can help creators understand how their content performs.
Pay attention to things such as:
-
Views
-
Watch time
-
Audience retention
-
Click-through rate
-
Traffic sources
-
Returning viewers
-
Subscribers gained
Don't obsess over every number.
Look for patterns.
If viewers consistently leave during a particular section, ask why.
If one topic performs much better than others, investigate what made it different.
Step 31: Study Your Best-Performing Videos
Suppose you publish ten videos.
One gets significantly more views than the others.
Don't simply celebrate and move on.
Study it.
Ask:
-
What was the topic?
-
What was the title?
-
What did the thumbnail show?
-
How long was it?
-
How did it begin?
-
What questions did viewers ask?
-
What made people interested?
Then create another video that serves a related need.
Don't copy the video.
Build on the lesson.
Step 32: Listen to Your Audience
Comments can provide video ideas.
If someone asks:
"Can you show how to do this on Android?"
you've just received a potential topic.
If multiple viewers ask similar questions, that's an even stronger signal.
Your audience can help you discover what they want.
Step 33: Build a List of Future Video Ideas
Never depend on remembering ideas.
Create a note on your phone.
Whenever you think of a potential video, write it down.
You could organize it into:
Ideas
Potential topics.
Ready
Topics you have researched.
Recorded
Videos waiting for editing.
Published
Completed videos.
This creates a simple content pipeline.
Step 34: Create Series
Instead of treating every video as completely separate, create related series.
For example:
Smartphone Tips Part 1
Smartphone Tips Part 2
Smartphone Tips Part 3
Or:
Learn Video Editing — Lesson 1
Lesson 2
Lesson 3
Series can make it easier to generate content consistently.
Step 35: Don't Buy Equipment Too Early
You might eventually want:
-
A better microphone
-
Tripod
-
Lighting
-
Camera
-
Laptop
-
External storage
But don't buy everything before you've created your first videos.
Use your phone.
Learn.
Publish.
See what problems you actually encounter.
Then upgrade strategically.
Step 36: Improve One Thing at a Time
Don't try to become an expert filmmaker immediately.
For your first month, focus on:
Month 1: Better audio
Month 2: Better lighting
Month 3: Better editing
Month 4: Better thumbnails
You can adjust this based on your needs.
Small improvements add up.
Step 37: Decide Whether to Show Your Face
You don't have to appear on camera.
You can create:
-
Screen recordings
-
Tutorials
-
Voiceover videos
-
Demonstrations
-
Slideshows
-
Product explanations
-
Hands-only videos
-
Educational animations
However, if your content depends on personality and personal connection, appearing on camera may help.
Choose what fits your topic and comfort level.
Step 38: Use Screen Recording
If your channel is about:
-
Apps
-
Websites
-
Software
-
Smartphone settings
-
Tutorials
screen recording can be extremely useful.
You can record the screen and explain what you're doing.
This is one of the easiest types of content to create with a smartphone.
Step 39: Create Content That Solves Problems
A useful question to ask before recording is:
What problem does this video solve?
For example:
"How to Free Up Storage on Your Phone"
solves a specific problem.
"Things About Phones"
is much less specific.
The more clearly you understand the viewer's problem, the easier it becomes to create useful content.
Step 40: Think About Searchable Topics
YouTube is also a search engine.
People search for:
-
How-to guides
-
Reviews
-
Comparisons
-
Tutorials
-
Explanations
-
Product information
-
Solutions to problems
This creates opportunities for smaller channels.
Instead of trying to compete immediately for enormous topics, consider specific questions.
Step 41: Make Evergreen Videos
Some videos remain useful for a long time.
Examples:
-
How to organize your phone
-
How to edit videos
-
How to create a resume
-
How to learn a skill
-
How to improve productivity
These are sometimes called evergreen topics because they aren't dependent entirely on a short-lived trend.
You can combine evergreen content with timely topics.
Step 42: Use Trends Carefully
Trending topics can attract attention.
But don't chase every trend.
Ask:
Does this trend fit my channel?
If not, creating a random video about it may confuse your audience.
Stay close to your main topic whenever possible.
Step 43: Build Trust
Don't pretend to know something you don't know.
If you're testing something, say so.
If you're giving an opinion, identify it as an opinion.
If information changes frequently, check current sources.
Trust is more valuable than a single viral video.
Step 44: Avoid Copyright Problems
Don't simply download someone else's video and upload it to your channel.
Don't use copyrighted music or footage without understanding the rights.
Create your own material whenever possible.
If you use third-party material, understand the applicable license or permission requirements.
Copyright rules can vary by situation and country, so when in doubt, research the specific material before publishing.
Step 45: Don't Buy Subscribers or Views
Buying subscribers may make your channel number look bigger.
It doesn't create a real audience.
Fake engagement can also distort your analytics and make it harder to understand what genuine viewers actually want.
Build your audience naturally.
Step 46: Don't Use Clickbait That Misleads People
A strong title is useful.
A misleading title isn't.
If your video promises something you don't deliver, viewers may lose trust.
Use curiosity responsibly.
Step 47: Create a Simple Weekly Workflow
You can organize your week like this:
Monday
Research ideas.
Tuesday
Write a script.
Wednesday
Record.
Thursday
Edit.
Friday
Create thumbnail and upload.
Weekend
Review analytics and plan the next video.
You can adjust this based on your schedule.
Step 48: Create Your First 10 Videos
Don't judge the entire channel based on one video.
Give yourself a challenge:
Create 10 videos.
Your first ten videos are your training ground.
You will learn:
-
What you're comfortable recording
-
What topics interest you
-
What editing takes time
-
What viewers respond to
-
What you need to improve
By video ten, you may already be much better than you were at video one.
Step 49: Consider Shorts
Short-form videos can be another way to experiment with ideas.
You could turn a longer video into several shorter educational clips.
For example:
Long video:
10 Smartphone Features You Should Know
Possible Shorts:
Feature #1
Feature #2
Feature #3
This allows you to explore different formats.
Step 50: Don't Depend on YouTube Income Immediately
Starting a channel doesn't guarantee income.
Build your audience first.
As your channel grows, possible monetization routes may include:
-
YouTube advertising
-
Fan funding features
-
Memberships
-
Shopping features where available
-
Sponsorships
-
Affiliate marketing
-
Your own products or services
Availability varies by country, eligibility, and feature.
Understanding YouTube Monetization in 2026
YouTube's current Partner Program requirements include different levels of access.
For the expanded YouTube Partner Program in eligible countries, creators can qualify for earlier access to certain fan-funding and shopping features at 500 subscribers, provided they also have three valid public uploads in the last 90 days and either 3,000 valid public watch hours in the last 12 months or 3 million valid public Shorts views in the last 90 days. (Google Support)
For ad revenue sharing and YouTube Premium revenue, the current threshold is generally 1,000 subscribers plus 4,000 valid public watch hours in the last 12 months, or 1,000 subscribers plus 10 million valid public Shorts views in the last 90 days. Shorts Feed watch hours do not count toward the 4,000-hour requirement. (Google Support)
YouTube also requires creators to follow its monetization policies, have an eligible channel location, use two-step verification, and meet other account requirements. (Google Support)
These requirements can change, and some features have additional conditions, so check YouTube Studio's Earn section for the requirements applicable to your channel.
Step 51: Don't Build Your Channel Only for Money
Money can be a goal.
But if every video is created only because you think it will make money, you may lose motivation quickly.
Instead, focus on:
Helping people
Entertaining people
Teaching something
Solving problems
Sharing useful experiences
When viewers find your content valuable, building an audience becomes easier.
Step 52: Use Your Phone to Manage the Entire Process
One of the biggest advantages of starting with a smartphone is that you can handle nearly the entire workflow from one device.
You can:
Research → Script → Record → Edit → Thumbnail → Upload → Analyze
without needing a traditional studio.
That makes the barrier to entry much lower.
A Simple 30-Day YouTube Challenge
If you want to start now, try this:
Days 1–3
Choose your topic and channel name.
Days 4–5
Set up your channel.
Days 6–7
Research your first ten video ideas.
Days 8–10
Write and record your first video.
Days 11–12
Edit and upload it.
Days 13–16
Create your second video.
Days 17–20
Create your third video.
Days 21–24
Create videos four and five.
Days 25–27
Review your analytics.
Days 28–30
Plan your next ten videos based on what you've learned.
Don't worry if the first videos aren't perfect.
The objective is to build the habit.
Common Beginner Mistakes
Avoid these mistakes:
Waiting for a Perfect Camera
Start with your phone.
Buying Too Much Equipment
Upgrade only when necessary.
Making Videos About Everything
Develop a recognizable topic.
Creating Without Research
Find out what viewers are interested in.
Making Long Introductions
Get to the point.
Ignoring Audio
Clear audio is essential.
Posting Once and Quitting
Give yourself enough time to learn.
Buying Subscribers
Build a real audience.
Copying Other Creators
Learn from them without duplicating their content.
Chasing Every Trend
Stay relevant to your niche.
Final Thoughts
You don't need a professional camera to start a YouTube channel in 2026.
You can begin with the smartphone you already own.
Choose a topic you understand or genuinely want to learn.
Research what people are interested in.
Create useful videos.
Improve your audio and lighting.
Learn basic editing.
Write clearer titles.
Create better thumbnails.
Study your analytics.
Listen to your audience.
And keep publishing.
Your first video probably won't be your best.
That's completely normal.
The goal isn't to create a perfect channel on day one.
The goal is to create your first video.
Then your second.
Then your third.
With every upload, you'll learn something about recording, editing, storytelling, thumbnails, titles, and your audience.
Eventually, your smartphone can become more than a device for watching videos.
It can become your camera, editing studio, publishing tool, and connection to a global audience.
Start with what you have.
Learn as you go.
Improve one thing at a time.
And most importantly, keep creating.

You must be logged in to post a comment.